Search This Blog

Thursday, December 29, 2011

Bleu Cheese Chips | Lifestyle Food Photographer

I've made these chips many times over the years, thanks to my friend Jenna who introduced them to me long ago at Cap City Fine Diner. They are so addictive, I've eaten an entire plate for dinner before.

If you're making them to take to a party, I'd suggest getting the ingredients together, than assembling and baking on-site-if there's an oven available, of course.

Blue Cheese Chips - Buy from Photo Kitchen
Love this picture? Buy a copy from Photo Kitchen.

My recipe is as follows:

Bleu Cheese Chips

1 large (approx $3.79) bag of Kettle Style Potato Chips
1/2 jar of store-bought Alfredo Sauce
1/4 lb. crumbled bleu cheese
2 green onions/scallions, chopped (optional)

Pour the chips into a rectangular oven-safe casserole dish (metal or glass). Top the chips with the alfredo sauce (in dollops, try to distribute evenly across the chips.) Sprinkle the bleu cheese (and optional green onions) over the chips. Bake at 400 degrees for 10 minutes, or until the cheese has melted and the chips are slightly browned on the edges. Serve immediately.

Now, this is not a follow-the-rules kind of recipe. You can adjust and experiment with these 3 simple ingredients until you've found the right mix for you. I've tried homemade bechamel sauce in place of the alfredo sauce. (I felt it was bland and much more labor intensive.) You can buy a really nice bleu cheese and add more or less bleu cheese to suit your tastes.

Want more variations? What about Kettle Chips topped with Barbeque Sauce and Cheddar Cheese? Or Thousand Island Dressing and Swiss Cheese? Try out your own creation, and make sure to tell us how it turns out!


Saturday, December 24, 2011

Lemon Ricotta Cookies with Lemon Glaze | Midwest Food Photographer


You could call this a palette-cleansing cookie. That's Top Chef talk, right there. See, reality t.v. is educational. The reason I was drawn to this cookie is because of Northstar Cafe's Cloud 9 Pancakes. Baking with ricotta is not something I would've considered before trying their incredible pancakes. I can't do sweet without savory for breakfast. Adding cheese to pancakes seems to bridge the gap for me, so I thought, why not try it in a cookie? Besides, I love all things citrus. Lemon is so refreshing and light.

Lemon Ricotta Cookies - Buy this image from Photo Kitchen
Love this picture? Buy a copy from Photo Kitchen.


Lemon Ricotta Cookies with Lemon Glaze
www.foodnetwork.com

Ingredients
Cookies:
* 2 1/2 cups all-purpose flour
* 1 teaspoon baking powder
* 1 teaspoon salt
* 1 stick unsalted butter, softened
* 2 cups sugar
* 2 eggs
* 1 (15-ounce) container whole milk ricotta cheese
* 3 tablespoons lemon juice
* 1 lemon, zested

Glaze:
* 1 1/2 cups powdered sugar
* 3 tablespoons lemon juice
* 1 lemon, zested

Directions Cookies:
In a medium bowl combine the flour, baking powder, and salt. Set aside.

In the large bowl combine the butter and the sugar. Using an electric mixer beat the butter and sugar until light and fluffy, about 3 minutes. Add the eggs, 1 at a time, beating until incorporated. Add the ricotta cheese, lemon juice, and lemon zest. Beat to combine. Stir in the dry ingredients.

Line 2 baking sheets with parchment paper. Spoon the dough (about 2 tablespoons for each cookie) onto the baking sheets. Preheat the oven to 375 degrees F.
Bake for 15 minutes, until slightly golden at the edges. Remove from the oven and let the cookies rest on the baking sheet for 20 minutes.

Directions Glaze:
Combine the powdered sugar, lemon juice, and lemon zest in a small bowl and stir until smooth. Spoon about 1/2-teaspoon onto each cookie and use the back of the spoon to gently spread. Let the glaze harden for about 2 hours. Pack the cookies into a decorative container. Yields 2 dozen (or more)

Friday, December 23, 2011

Egg Nog Snickerdoodles | Commercial Food Photographer

Two perfect reasons to make these cookies:
1. You love Egg Nog.
2. You hate Egg Nog but someone left it at your house.

Either way, you'll like these cookies! If you don't, take them to work and make your coworkers eat them. They're really light and the flavors are subtle, a nice contrast to the majority of holiday treats.

Egg Nog Snickerdoodles - Buy from Photo Kitchen


Love this photo? Buy a copy from Photo Kitchen.
 

The paper trees in the background have been my favorite part of this holiday season. I've really enjoyed making them, thanks to fellow photographer and blogger Davina Fear, who happily shared the idea. Those of you who are parents, Davina has some of the cutest crafts and activities I have EVER seen.

Eggnog Snickerdoodle Cookies
www.whatkatiesbaking.com

1 ½ c flour
½ stick butter
½ cup sugar
1 egg
1/2 cup egg nog (I used soy Silk Egg Nog, and it worked perfectly.)
½ tsp baking soda
1 tsp cream of tartar
1/8 tsp salt
1/8 cup sugar + 1 tbsp cinnamon for rolling

Directions:

1. Preheat oven to 350 degrees.
2. Sift together flour, cream of tartar, baking soda, and salt; set aside.
3. In the bowl of an electric mixer fitted with a paddle attachment, combine butter and 1/2 cup sugar. (I used the paddle attachment like it says, but I used a regular beater for my next cookie recipe (also to combine butter and sugar) and it worked just fine.
4. Beat on medium speed until light and fluffy, about 2 minutes. Scrape down sides of bowl.
5. Add egg and eggnog, and beat to combine.
6. Add dry ingredients, and beat to combine. Don't overmix.
7. You can chill the dough for an hour or more to make the dough easier to scoop, or go ahead and scoop them a little messier.
8. In a small bowl, combine 1/8 cup sugar and 1 tbsp ground cinnamon.
9. Use a small ice-cream scoop or a tablespoon to form balls of the dough, and roll in cinnamon sugar.
10. Place about two inches apart on the prepared baking sheets.
11. Bake until the cookies are set in center and begin to crack, about 10 minutes, rotating the baking sheets after five minutes. The cookies will feel a little doughy when you touch them, but trust me, they're finished.
12. Transfer the cookies to a wire rack as soon as they are cool enough to not fall apart. Yields 18-20 cookies.

Thursday, December 22, 2011

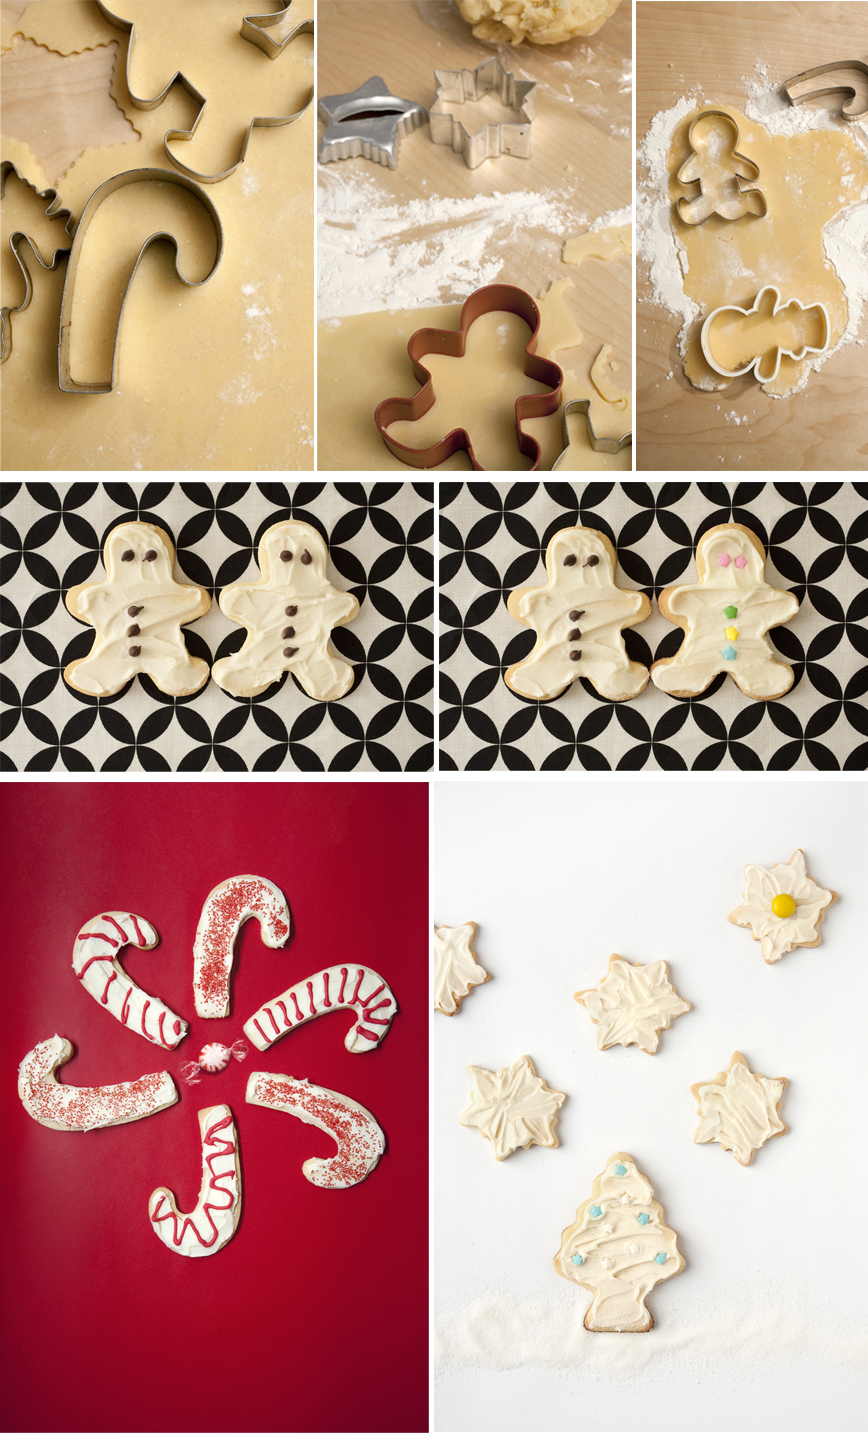
Cream Cheese Sugar Cookies | Midwest Food Photographers

Sugar cookies are the most versatile cookie for decorating. Perfect for any shape, icing, and sprinkle you can imagine. I can't say this is the best sugar cookie recipe in the world, but it might be your favorite. How do you know unless you try it?

Love this photo? Buy it from Photo Kitchen.
For a little while when we were younger, my brother and I spent a LOT of time icing cookies. His was done at Cheryl's Cookies and mine was at a deli that had a large variety of pastries and sweets. We both got really good at it, and I still find it comforting to take out a tray of cookies and smear the icing on. Maybe he and I will do a How-to video someday.

Cream Cheese Sugar Cookies

Ingredients

* 1 cup white sugar
* 1 cup butter, softened
* 1 (3 ounce) package cream cheese, softened
* 1/2 teaspoon salt
* 1/2 teaspoon almond extract
* 1/2 teaspoon vanilla extract
* 1 egg yolk
* 2 1/4 cups all-purpose flour

Directions

1. In a large bowl, combine the sugar, butter, cream cheese, salt, almond and vanilla extracts, and egg yolk. Beat until smooth. Stir in flour until well blended. Chill the dough for 8 hours, or overnight.
2. Preheat oven to 375 degrees F (190 degrees C).
3. On a lightly floured surface, roll out the dough 1/3 at a time to 1/8 inch thickness, refrigerating remaining dough until ready to use. Cut into desired shapes with lightly floured cookie cutters. Place 1 inch apart on ungreased cookie sheets. Leave cookies plain for frosting, or brush with slightly beaten egg white and sprinkle with candy sprinkles or colored sugar.
4. Bake for 7 to 10 minutes in the preheated oven, or until light and golden brown. Cool cookies completely before frosting.


Wednesday, December 21, 2011

Thumbprint Cookies | Food Photography Columbus Ohio

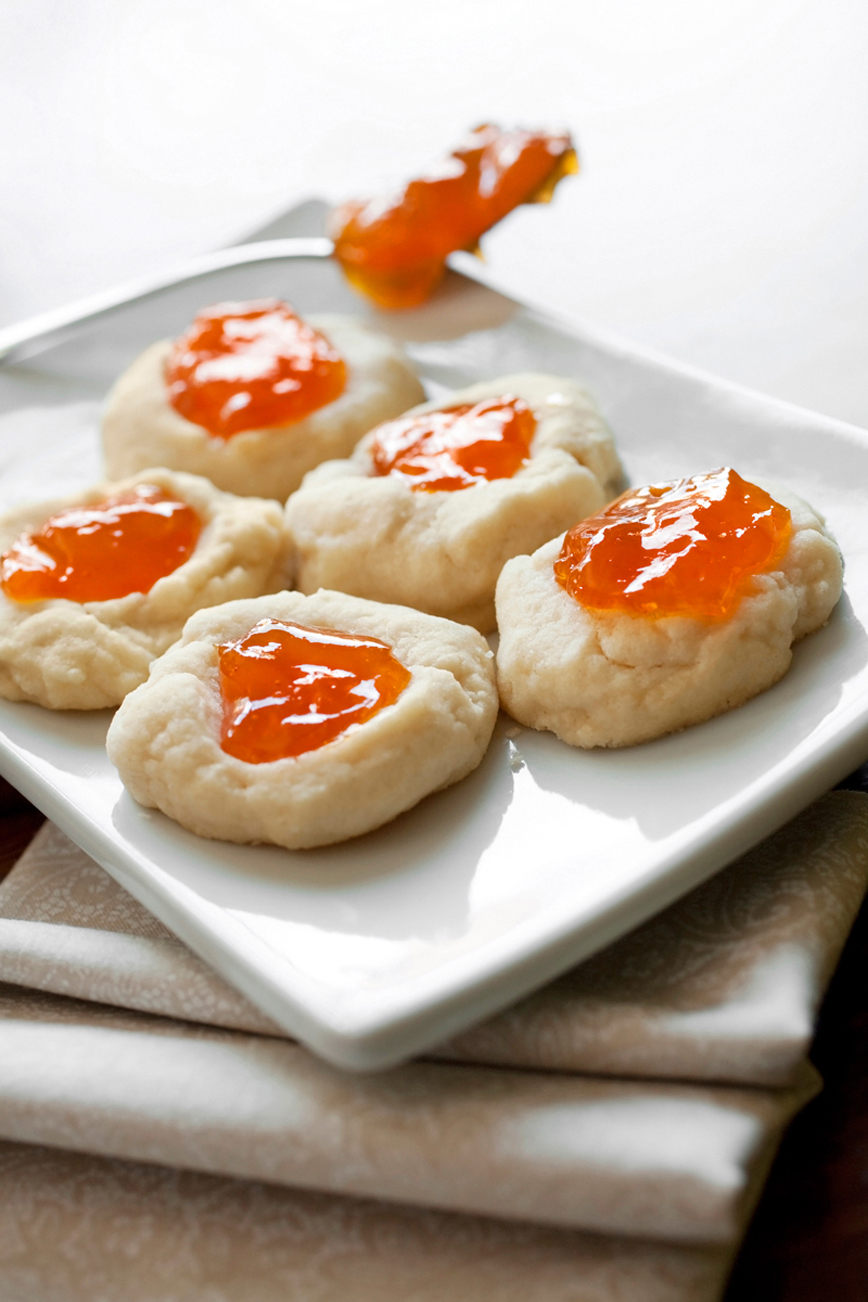
Thumbprint Cookies are maybe the easiest cookies in the world to make. I don't eat many peanut butter and jelly sandwiches, but I often find an open jar of jam in the fridge that needs to be used up. This is my preferred way to get rid of unwanted jam.

OR, if I feel like splurging, I use Sweet Thing Gourmet's jam. This jam is so good, I can't see myself ever wasting it on a peanut butter and jelly sandwich. I often eat it on a banana or with cream cheese and crackers, or of course, in these cookies, so I can truly enjoy how fantastic it is without covering it up with other flavors. My favorite (shown here) is the Brandied Apricot Jam. I swear, I don't love it just because it's orange.

Thumbprint Cookies - Buy this photo from Photo Kitchen


Love this photo? Buy it from Photo Kitchen now.
Thumbprint Cookies
from Betty Crocker
 
¼ cup packed brown sugar
¼ cup shortening
¼ cup butter or margarine, softened
½ teaspoon vanilla
1 egg, separated
1 cup all-purpose flour
¼ teaspoon salt
¾ cup finely chopped nuts (optional)
Jelly of your choice

Heat oven to 350ºF. Mix brown sugar, shortening, butter, vanilla and egg yolk in medium bowl. Stir in flour and salt until dough holds together. Shape dough into 1-inch balls. Beat egg white slightly. Dip each ball into egg white. Optional: roll in nuts. Place about 1 inch apart on ungreased cookie sheet. Press thumb deeply in center of each.
Bake about 10 minutes or until light brown. Immediately remove from cookie sheet to wire rack. Cool completely, about 30 minutes. Fill thumbprints with jelly.

Tuesday, December 20, 2011

Mexican Hot Chocolate Cookie | Professional Food Photographer

My first experience with sweet treats made spicy was actually in Mexico, in 2002. We were at a resort that served Mexican Coffee after dinner, and it had cinnamon and something some type of pepper in it. It was wonderful. It took a few years before I saw anything similar back home, and that was of course Jeni's Queen City Cayenne ice cream. I always try the most unusual flavor on any menu, and when I saw chocolate and cayenne together, I had to have it. Sometimes I love unusual things just because of their uniqueness factor, but later the novelty will wear off. Many years later, Queen City Cayenne is still my favorite of Jeni's signature flavors.


When I saw Martha's take on a spicy sweet treat, I jumped on it. The only downside to these cookies was the need for a warning label, so kids wouldn't assume they were just chocolate cookies. Oh well, it makes for cuter packaging with the little warning label attached.


Mexican Hot Chocolate Cookie
from Martha Stewart

    * 2 1/4 cups all-purpose flour
    * 1/2 cup unsweetened cocoa powder
    * 2 teaspoons cream of tartar
    * 1 teaspoon baking soda
    * 1/2 teaspoon coarse salt
    * 1 cup (2 sticks) unsalted butter, room temperature
    * 1 3/4 cups sugar
    * 2 large eggs
    * 2 teaspoons cinnamon
    * 1/2 teaspoon chile powder (I used ground cayenne)

Directions

   1. Preheat oven to 400 degrees, with racks in upper and lower thirds. In a medium bowl, sift together flour, cocoa powder, cream of tartar, baking soda, and salt. In a large bowl, using an electric mixer, beat butter and 1 1/2 cups sugar on medium speed until light and fluffy, about 2 minutes. Scrape down side of bowl. Add eggs and beat to combine. With mixer on low, gradually add flour mixture and beat until combined.
   2. In a small bowl, combine remaining 1/4 cup sugar, cinnamon, and chile powder (if using). Using heaping tablespoons, form balls of dough and roll in cinnamon-sugar mixture. Place, about 3 inches apart, on two parchment-lined baking sheets. Bake until cookies are set in center and begin to crack, about 10 minutes, rotating sheets halfway through. Let cookies cool on sheets on wire racks 5 minutes, then transfer cookies to racks to cool completely. Makes 32. Store in an airtight container, up to 1 week.

Monday, December 19, 2011

Galaxy Cookies | Food Photography and Styling

These Galaxy Cookies may look humble, but believe me, they're out of this world. (Ha! That was a pun I stole from my sister.) Really, these are one of my all-time favorite cookies. I loved making them as a kid. The best part is you can decorate and fill them with anything you love. Hands down, my favorite is Maraschino Cherry.


It's a simple colored dough wrapped around a candy or nut and topped with sprinkles. You can also cover them in icing. What should you put in them? How about...


Galaxy Cookies
from Betty Crocker

1/2 cup butter or 1/2 cup margarine, softened
3/4 cup confectioners' sugar
1 tablespoon vanilla
food coloring
1 1/2 cups all-purpose flour
1/8 teaspoon salt
anything you want to put in the middle

Icing

1 cup confectioners' sugar
2 1/2 tablespoons light cream or 1 1/2 tablespoons milk
1 teaspoon vanilla

Directions

Mix thoroughly butter, sugar, vanilla, and, if desired, a few drops of food coloring. (Or you can wait to add the food coloring when the dough is finished in order to split it into batches and make multiple colors instead of just one.)
Work in salt and flour until dough holds together. If dough is dry, mix in 1 to 2 Tbsp light cream.
Mold dough by tablespoonfuls around date, nut, candy, cherry, or a few chocolate pieces. Roll into balls. Here, you can choose to decorate with sprinkles, or wait until they're baked and top with icing.
Preheat over to 350°F. Place cookies about 1-inch apart on an ungreased cookie sheet. Bake 12-15 minutes until set but not brown.
Prepare icing by mixing confectioners sugar with light cream or milk and vanilla until smooth. If desired, stir in a few drops of food coloring. For a tasty chocolate icing, increase light cream to 3 tbsp and stir in 1 oz melted unsweetened chocolate.
Let cookies cool, then dip tops of cookies into icing several times to get a good layer. If desired, immediately decorate with coconut, nuts, colored sugar, candies, chocolate pieces or chocolate shot.
Makes 20 to 25 cookies.


Monday, December 5, 2011

Homemade Orange Rolls | Columbus Ohio Food Photographer and Stylist

Pillsbury Orange Rolls have always been an all-time favorite of mine. I'd eat the entire can in a sitting if no one was watching. So, when I had leftover orange icing (recipe included below), what better to make than Homemade Orange Rolls? They would beat the store bought kind, right? Yup, they did. And I had just as hard a time  sharing them with others.

Warning: This is one of those recipes you have to let "rest." Which means work, then wait. Work some more, then wait. There's a wait time of an hour and fifteen minutes, then another wait time of 25 minutes, so don't expect to do this in a hurry.

Here's a picture to entice you.


Making the dough was easier than I thought it would be. Historically, I don't have much luck with homemade dough. This one came together just as the recipe said it would.


This recipe has you roll each of the rolls (I couldn't see how to avoid saying that!) individually. Since I'd never made rolls from scratch before, I followed the instructions, but I recently watched someone else make cinnamon rolls, and they laid the dough out in a rectangular sheet then poured the filling over it, and rolled the whole sheet up and cut it into pieces. This seems much faster. The knife might smoosh the rolls as they're being cut and the butter might squish out the ends, but I will try it that way next time anyway.


I might cook them just a little less next time. I like them a little gooey-er and less brown on top, but once I put the icing on and it all melded together, there was little that could be done to make them more perfect. The dough TASTED homemade, in the best way, and the icing was amazing. The rolls grew HUGE, so each roll was equivalent to 2-3 of the store bought kind.


A special recipe to share around the holidays, but consider making them on a normal weekend. Whomever you choose to share them with will be indebted to you. 


Homemade Orange Rolls (from myrecipes.com)

Ingredients


   Dough
* 1 package dry yeast (about 2 1/4 teaspoons)
* 1/2 cup warm water (100° to 110°)
* 1/2 cup sugar
* 1/2 cup reduced-fat sour cream
* 2 tablespoons butter, softened
* 1 teaspoon salt
* 1 large egg, lightly beaten
* 3 1/2 cups all-purpose flour, divided
* Cooking spray

   "Filling" For Dough
* 1 stick butter, melted
* 3 tablespoons grated orange rind
* 3 tblsp cinnamon
* 1/2 cup sugar

   Icing (from Wilton.com)
* 1 stick butter, softened
* 1 package (8 oz.) cream cheese, softened
* 4 cups sifted confectioners' sugar (about 2 lbs.)
* 1 tablespoons milk
* 1 tablespoon orange juice
* 1 tablespoon orange zest

* You can prepare icing ahead of time and refrigerate, covered. (Icing directions are listed at the end.)

* To prepare dough, dissolve yeast in warm water in a large bowl; let stand 5 minutes. Add 1/4 cup sugar, 1/2 cup sour cream, 2 tablespoons softened butter, salt, and egg, and beat with a mixer at medium speed until smooth. Lightly spoon flour into dry measuring cups; level with a knife. Add 2 cups flour to yeast mixture; beat until smooth. Add 1 cup flour to yeast mixture, stirring until a soft dough forms. Turn dough out onto a floured surface. Knead until smooth and elastic (about 10 minutes); add enough remaining flour, 1 tablespoon at a time, to prevent dough from sticking to hands (dough will feel sticky).
 

Place dough in a large bowl coated with cooking spray, turning to coat top. Cover and let rise in a warm place (85°), free from drafts, 1 hour and 15 minutes or until doubled in size. (Gently press two fingers into dough. If indentation remains, dough has risen enough.)
 

Sunday, November 27, 2011

Cocktail Couture: OYO Vodka White Russian

White Russian sounds and looks like the perfect drink for a snowy winter day. Since we'll be seeing many of those coming up soon, why not cheers to one right now? For this final drink in our Cocktail Couture series featuring local spirits from around Columbus, Jenna Sais Quois, a super-talented graphic designer and my favorite fashion blogger, lent us her amazing collection of white and silver jewelry. Staring at all the glittering white reminds me of freshly fallen snow, which I absolutely love. Yes, an Ohioan who loves snow. Feel free to hate, I'm used to it. Many times I've been blamed for the very existence of snow.

We've featured Middle West Spirits once before in this series for their whiskey, but their first love was vodka. When touring the distillery, they share that vodka is often described as flavorless and odorless, but they didn't want to rid the drink of all it's naturally occurring flavors and odors. In fact, the International Review of Spirits describes OYO vodka as “Clear, bright aromas of dried pear, custard and buttery honeyed praline with a supple, soft off-dry medium-full body with a long, spicy apple pie crust, cream and mineral finish. Exceptional, flavorful and delicious.”


OYO Vodka White Russian

Fill a lowball glass with ice
Add 1 oz. of OYO Vodka
1.5 oz. Kahlua
1 oz. of Cream, or half & half

The recipe calls for 1 oz. of cream, but I pour enough to fill the glass. Otherwise I find it to be too strong. To drink, stir well, but I think it looks prettier with the cream floating on top and the swirls of brown running through. To create this effect, turn a spoon upside down and pour the cream over it and into the glass. It stops the pour from disturbing the liquor in the bottom of the glass. 


For our other Cocktail Couture posts, visit:
Tessora Lemon Cappuccini  
Watershed Gin Pumpkin Drop
OYO Whiskey Hot Apple Toddy
Camelot Cellars Pinot Noir
And visit Jenna Sais Quois for her super cute recipe cards and her take on these delicious local spirits.

Friday, November 25, 2011

A Food Photographer's Holiday Gift Guide to Columbus: Top 10

Tomorrow is small business Saturday, and I'm here to suggest some great gifts from 10 of my favorite Columbus small local businesses.

1. To make the most of your local restaurant giving, Dine Originals has gift certificates at discounted prices, While you're at it, buy a few for yourself. This dessert is from Deepwood Restaurant. Yum!


2. For a nice bottle of spirits, check out our Cocktail Couture Series, featuring Watershed Distillery, Middle West Spirits, Camelot Cellars, and Tessora Limone (shown). There's also Brothers Drake Meadery, and local breweries, such as Columbus Brewing Company. Attach a cute recipe card to the bottle for a personal touch.


3. Celebrate Local is a new pop-up shop at Easton, a one-stop-shop for local gifts. Here's a partial list of vendors selling at Celebrate Local. For more information, fan them on Facebook.


 4. The Candle Lab might not serve food, but tell me you don't smell toasted marshmallows and cranberry sauce when you walk in. Leave the mixing to the experts or create your own. I made a Campfire, Mulled Cider and Leather mix on a night out with friends. Entertainment and gift shopping in one.


5. For the kitchen dweller in your circle, grab some spices from North Market Spices. They're super friendly and would love to help you find the perfect mixes.


6. Grab some sweet goodies from Sugardaddy's . Now with 3 store locations (Polaris, Downtown and Easton), they're hard to miss.


7. How about a Clintonville Farmer's Market favorite that can be ordered online? Brezel Pretzels are fantastic, and a fun, unexpected gift.


8. For some dishes to eat all that food on, and much more, The Swanky Abode is a stylish, eclectic place to shop. (These cute coasters came from The Swanky Abode.)


9. Cooking classes are a fun activity to do as a couple, with friends, or with the kids. Here's a list of the best cooking class resources in Columbus, all with local businesses.


10. An easy gift that made it onto my list last year as well, is a subscription to Edible Columbus.


11. This is a top 10 guide, but how could I leave out Photo Kitchen, with an online photo library of over 10,000 photos to choose from and 150 products to print them on, you're sure to find the perfect gift. Search by subject or browse the collections, from oceans to skeleton keys, peaches to honey, and a whole lot in between.

Monday, November 21, 2011

Cocktail Couture: Camelot Cellars Pinot Noir

Just in time for happy hour, take a sip of Camelot Cellars' Chilean Pinot Noir. Jenna Brucoli (of the inspiring blog Jenna Sais Quois) and I have been following the changes at Camelot Cellars for the past year, and knew right away that this wine had a place in our Cocktail Couture series. Having relaunched this past July, new owner Janine Aquino has brought new life to the business. She has a deep-rooted history in the world of wine, and is the perfect fit for this Short North store.

Adding more focus on events, Camelot Cellars has hosted a number of big bashes in the last few months, including their grand reopening, Yelp's Meet-the-Owner, a Cbusr Meetup and Celebrity Bartender Nights. Janine is partnered with Edible Columbus' cooking classes, offering wine specifically paired to the evening's dishes.

Enough with the introductions, now feast your eyes on this dark, rich wine.


I got lucky and was given a leftover bottle of this Chilean Pinot Noir at the end of an Edible Cooking Class. I enjoyed it so much, I went out and bought another bottle. It has a scent similar to strawberry jam, but the flavor is smooth, rich, just slightly fruity, and a little smoky. I won't claim to be a wine expert, but what I love about wine is each person tastes something different, and there are millions to choose from to find your own favorites. This is number one on my list of Pinot Noirs, and probably in my top 10 reds.

Because the wine is so simple, we went simple on the accessories. A few beaded necklaces from my own collection brought out the reds and purples of the wine. The props were picked up locally, at flea markets and garage sales, including the tray from Worthington's flea market Treasure on the Green, and the plates of stained glass came from the Columbus Architectural Salvage. If you've never been to either, you really should. Some of my best props have come from both.


One last note: A group of my friends spent a birthday making wine at Camelot Cellars and had a great time. Now every time I see a bottle of the wine we made, I remember the fun we had. What a great, drinkable souvenir.

Check out our previous cocktails from our Cocktail Couture series here:
Tessora Lemon Cappuccini
Watershed Gin Pumpkin Drop
Oyo Whiskey Hot Toddy

Sunday, November 13, 2011

Cocktail Couture: OYO Whiskey Hot Toddy


Continuing with our Cocktail Couture series with Jenna Sais Quois, we've come up with the perfect fall recipe for Middle West Spirit's OYO Whiskey!

Hot Toddy's are not a new invention, but they're new to me. I've never liked whiskey, until I tried OYO Whiskey. My interest in Middle West Spirits isn't just because they're local, though of course I appreciate that. I love their products because I can taste the care that's put into them. They take nothing for granted, every step of their process has been considered. The depth of flavors is incredible, and while there is so much flavor in every sip, they're still easy mixers, blending well with all sorts of other ingredients.

You can read more about what makes Middle West Spirits special in Edible Columbus' Winter 2010 issue (starting on p.46). I was thrilled to photograph them for this piece, and learned so much while touring their distillery, which, by the way, you can do, too!


Hot Apple Toddy

2 oz. OYO Whiskey
2-3 tablespoons honey
1 teaspoon sugar
1 cup (or so) apple cider
Cinnamon Stick (garnish)

Start by adding a little Ohio honey to the bottom of your mug. Next add the OYO Whiskey and sugar and then fill the rest of the glass with hot apple cider. Use the cinnamon stick to stir the honey into the drink. The longer the cinnamon stick stays in the drink, the more spiced your drink will become.
This is a great party recipe. Just heat a gallon of apple cider and the sugar on the stove and have the mugs ready with the honey, whiskey and cinnamon stick. Then have your guests ladle the apple cider into their mug when they're ready for a drink!

Apple cider and honey are two Ohio staples, and are super easy to source locally. To see more about the different honey varieties, check out our honey post on Design Sponge.


The locket necklace featured here is from Substance, a great store for accessories in the Short North. But lucky you, this necklace is available online, too! The string of gold beads is from Jenna Brucoli's accessory collection, along with the dangling gold bands, but none of the sparkly jewelry can outshine the golden whiskey. Now go build a fire and heat up the cider for a great evening curled up inside.

Check out our previous cocktails here:
Tessora Lemon Cappuccini
Watershed Gin Pumpkin Drop


Thursday, November 10, 2011

Columbus Ohio Food Photographer: Feast Your Eyes on Bleu & Fig

Come feast your eyes on the beautiful spreads and floral arrangements created by Bleu & Fig! While photographing six events both catered and decorated by the crew at Bleu & Fig, I've gotten to capture their talents AND indulge in a few bites of it myself. My job rocks!

Monday, November 7, 2011

Cocktail Couture: Tessora Lemon Cappuccini

The second in our Cocktail Couture series with Jenna Sais Quois is Tessora Limone, a wonderful liqueur I've just recently been introduced to! It's new to the scene, but has already landed in over 100 restaurants and bars around the city and is available in over 30 stores by the bottle!

It's not easy to describe Tessora, as it's a one-of-a-kind drink. You can read a bit about their history, but if I were to describe it, I'd say it's like a lemon creamsicle. Creamy like Bailey's Irish Cream, with a nice lemon flavor-not tart or bitter, just smooth and a little bit sweet.  I'd be afraid to sit down with a bottle next to me, it might disappear faster than lemonade!


This recipe is straight off Tessora's website and was created by Craig Loose, the bartender at Black Creek Bistro. (Who, by the way, serves all sorts of local spirits!) Since I knew so little about Tessora, I wanted a trusted recipe source. Well, I lucked out. This drink is my favorite of the series. I love unusual drinks, and this fits the bill. I would never have thought to combine lemon and coffee flavors, but this is just brilliant.


Lemon Cappuccini

Distinctive Cappuccino flavors with hints of lemon and cream.  1 bean for luck, 1 bean for life, and 1 bean for love.

2 oz Van Gogh Double Espresso Vodka, chilled
3/4 oz Tessora Liqueur, chilled
Garnish with 3 Espresso Beans


Mix and serve in vintage cocktail glasses. These glasses came from a shop in Sunbury, Ohio, Village Square Antique Mall. There are many vendors inside one building, and one in particular, NouVeau Bohemian, that I love to shop with. She always has something I didn't know I needed, but now can't live without.

In making this a second time, I'd play around with the proportions, maybe adding more Tessora. Once it chilled in the refrigerator for a bit the flavors married nicely, so you could prepare a bunch overnight for a party the next day.

The jewelry is from my Cocktail Couture partner, Jenna Brucoli. I got to prop shop in her amazing collection of vintage accessories, and these immediately caught my eye. I love clothing that mimics food, and these strands look like wonderfully colorful hard candy. She's created a beautiful design around the photos and added her own style to the story. Make sure to check out her post!


Don't forget about our previous Cocktail Couture post for Watershed Gin!

Monday, October 31, 2011

Cocktail Couture: Watershed Gin Pumpkin Drop

We Cbusr's sure do love our hometown booze! Columbus is getting some well-deserved local and national recognition for our distilleries, wineries, and breweries. In honor of these fine establishments, I've partnered with fellow Edible Columbus contributor Jenna Brucoli of the fantastic design and fashion blog, Jenna Sais Quois, to bring you Cocktail Couture.

Haute couture refers to the creation of exclusive custom-fitted clothing, usually made from high-quality, expensive fabric and sewn with extreme attention to detail and, often using time-consuming, hand-executed techniques. Well, in relation to these cocktail and accessory pairings, the hand-crafted alcohol is couture. The creators are dedicated to their craft, making award-winning bottles of gin, vodka, whiskey, wine and Tessora (similar to limoncello.)

Our first recipe uses Watershed Gin. Even gin-haters will enjoy this cocktail! (I have proof, I tested the cocktail out on a number of gin-haters.) This makes a fun punch, or if made more concentrated, it's great for shots or mini-cocktails. It's a perfect fall drink, and could be made even more fun with floating spider rings, a sugared rim, or served in hollowed out mini pumpkins.


Pumpkin Drop

1.            1 oz. Watershed Gin
2.            1 oz. pumpkin puree
3.            1 1/2 oz. fresh lemon juice
4.            1 1/2 oz. simple syrup
5.            Ginger Ale


Combine the gin, pumpkin, lemon juice and simple syrup in a cocktail shaker half-filled with ice, and shake briskly until combined. Strain into a shot glass or small highball glass and top off with Ginger Ale. The Ginger Ale can be substituted with champagne, sparkling wine, or cream soda. They're all good!

Here's the link to Jenna's post, with a twist.

In honor of Halloween, I couldn't resist adding a few of my favorite pumpkin photos. Keep an eye out for more Cocktail Couture to come!

Thursday, October 13, 2011

Homemade Peach Cobbler Food Photographer | Columbus Ohio

Although peaches are no longer in season in Ohio, I just couldn't wait to post this until next year! So the next time you find yourself with a whole bunch of wonderful peaches, MAKE THIS RECIPE.

It is possible that I will never be satisfied with another peach now that I've found Branstool Orchards. I'd heard the hype, but I didn't believe it until I broke down and tried one of their peaches. I now know why they sell an entire TRUCK of peaches within an hour at the Farmer's Market. It's like you remember what a peach is supposed to taste like! I could photograph these peaches all day long, they deserve the limelight.

Of course, they are perfect on their own, so why make cobbler out of them? Well, because they perish quickly and I'd hate to see a peach like this go to waste! Even eating 3-4 a day, I couldn't get through all of them fast enough, hence the cobbler.

The recipe is below, just keep scrolling!


Here's the recipe, borrowed from MyRecipes.com and adapted a little:

Ingredients
* 1/2 cup unsalted butter
* 1 cup all-purpose flour
* 2 cups sugar, divided
* 1 tablespoon baking powder
* Pinch of salt
* 3/4 cup milk
* 4 cups fresh peach slices
* 1 tablespoon lemon juice
* Handful of fresh sage leaves
* Ground cinnamon or nutmeg (optional)

Preparation
* Melt butter in a 13- x 9-inch baking dish.
* Combine flour, 1 cup sugar, baking powder, and salt; add milk, stirring just until dry ingredients are moistened. Pour batter over butter (do not stir).
* Bring remaining 1 cup sugar, peach slices, and lemon juice to a boil over high heat, stirring constantly; pour over batter (do not stir). Sprinkle with cinnamon, if desired. Take the sage leaves and sprinkle over the top.
* Bake at 375° for 40 to 45 minutes or until golden brown. Serve cobbler warm or cool.

Now, for more pictures! This is a photography blog, after all.


The sage leaves were an addition of mine. I LOVE sage, and didn't want to see mine going to waste in my garden, so I figured it couldn't be a horrible idea, and added them at the last second. Put in as much or as little sage as you'd like. I only did about 8 leaves, but had I known it would be my favorite element, I would've added 15-20. Because they were on top, they caramelized and were super tasty!

Now, for the finished product! (Oh sorry, not the cobbler, just the pictures of the cobbler. Don't cry, it's ok.) I splurged the day I was making this and had bought some flowers from the Farmer's Market, which I never do. (I'm afraid my cats will eat them, that's all.) They drew me in, they were maybe the prettiest flowers I've ever seen, and they unknowingly would compliment my peach cobbler perfectly!

This is a really easy dish, I encourage even the least confident home cooks to try it! Just make sure you use really great peaches. :)

Tuesday, October 11, 2011

The Library Dish: Reasons This Food Photographer Loves Libraries

Who uses libraries anymore, you ask?
I do. And here's why!

1. Librarians are like your mother. They know everything.
.
Well, even if they DON'T know it, they know how to research to find it! Librarians are super smart, they're even required to have a Master's Degree in Library Sciences. Did you know that?

2. If you don't have electricity, the library might.

The library is just far enough away that if my electricity is out, the library's might not be. This is super important if I have a deadline looming with no working internet/computer. The library will let me use theirs FOR FREE.

3. Who doesn't want free entertainment?

Editing and retouching thousands of photos can get tedious and lonely. The library fills the gap with many an audio book, t.v. show and song. If it weren't for the library, all my profits would've ended up at Netflix and Half-Priced Books.

4. The legal mumbo-jumbo.

How did I learn everything I know about copyright laws? The library. Not only is it nice I don't have to buy the boring books, but the library encourages me to actually READ them. When I buy a book, I set it on my nightstand and promptly forget about it. But if it's a library book, I know it has an expiration date. Having that expiration date hovering over my head is what gets me to actually READ the book. It's like my conscience nagging at me.

5. Martha Stewart, Bon Appetit, and Paula Dean

I love me a food magazine and cookbook! Instead of having a million magazines cluttering up my house, I get them all from the library, stare at the pretty pictures for a while, then return them. I get my food porn fix then I move on. It's the perfect paper relationship.

Why do YOU love the library?

Support the Westerville Public Library by voting YES on Issue 19 on November 8th!


Thursday, September 22, 2011

Emeril Lagasse's Cookbook Sneak Peak: English Cottage Pie with Root Vegetables

I had the pleasure of partnering with Shawnie Kelley, the talented woman behind the Insiders' Guide To Columbus and the fun food blog Manges! Mangi! You should check out the event she's organized for tomorrow night, Fete Blanc--a pop-up picnic for 350 people all dressed in white!

Shawnie introduced me to this Emeril cookbook, so we decided to partner up--she did all the cooking and I did all the photography, then we both ate all the food. :)

We started out with this English Cottage Pie. As she was busy cooking, I said "This looks a lot like a Shepard's Pie" and she responded that a Shepard's Pie is made with lamb, hence the shepard, and that all other pies of the sort can be called Cottage Pie. So most of you who had thought they made a Shepard's Pie but used ground beef, you were wrong! It's a Cottage Pie. I am also guilty of this, but who cares: Americans aren't exactly known for keeping to tradition.


Shawnie has this brilliant little device for getting the skin off of garlic. (It's that tube looking thing above.) You just roll this Garlic Peeler around with the garlic inside and voila! No more peel. I love gadgets like this that are small but immensely helpful at doing tasks I hate.

She also has that potato ricer (with handles, above) that I thought could really come in handy. But I'm sure I'd be lazy and use a spoon to mash them instead.

You might notice that Shawnie also likes the color orange--there was orange food, orange dishes, orange towels, I was in orange heaven. It's my favorite color (notice the orange cake banner image?)

So, even though I didn't eat this cottage pie, the spices smelled incredible coming out of the oven, and Shawnie could hardly wait until it cooled down to take a bite. She was very happy with the result. I think this is a crowd-pleaser recipe. There's nothing scary or adventurous about it, it's just good, hearty food, perfect for a cold winter day.


The finished result is below. It looks nice plated, more like a lasagna than a big soupy mess, which is what mine usually look like. I can't be in a pet household without taking pictures of the pets. It would be rude, right? See, kitty loved the cottage pie, too!


You can find more recipe tests from Emeril's cookbook Sizzling Skillets and Other One-Pot Wonders in the 2 previous posts (quiche and soup), on Shawnie's blog, and on The Secret Ingredient's Facebook Page.

English Cottage Pie With Root Vegetables

5 tblsp unsalted butter, plus more for greasing the pan
2 tblsp vegetable oil
2 lbs lean ground beef
1 1/2 tsp salt, plus more for cooking the potatoes
3/4 tsp black pepper
1 1/2 c. diced onion
1/4 c. minced garlic
1 1/2 c. diced turnip
1 1/2 c. diced carrot
2 tblsp tomato paste
2 tblsp all-purpose flour
2 tsp dried rosemary
1 tblsp dried thyme
1 tblsp dried parsley
1 bay leaf
1 tblsp plus 1 tsp dry mustard
1 3/4 c. beef stock or canned low-sodium beef broth
1 tblsp Worcestershire sauce
3 lbs Idaho potatoes, peeled and quartered
1/4 tsp freshly ground white pepper
1/8 tsp freshly grated nutmeg
1 c shredded sharp yellow cheddar cheese

Grease a 3-quart baking dish with a small amount of butter and set aside.
Heat 1 tblsp of the butter and 1 tblsp of the oil in a deep 5 quart saute pan over medium-high heat. When hot, add the ground beef, 1/2 tsp of the salt, and 1/4 tsp of the black pepper. Cook the meat until browned, breaking it into pieces with a wooden spoon, 10-12 minutes. Transfer the beef to a plate and set aside.

Return the pan to the heat and add 1 tablespoon of the remaining butter and the remaining tablespoon of oil. Add the onion and cook, stirring until soft and lightly caramelized, about 5 minutes. Add the garlic and cook, stirring for 30 seconds. Add the turnip, parsnip, carrot, and 1/4 tsp of the remaining salt and cook until the vegetables are slightly tender, about 4 minutes. Return the beef to the pan and add the tomato paste. Cook, stirring, for about 1 minute. Add the flour and cook, stirring for another minute. Add the dried herbs, bay leaf, mustard, stock, and Worcestershire and stir to combine. Bring to a simmer and cook until the sauce is slightly thickened, about 1 minute. Reduce the heat so that the sauce barely simmers, cover and continue to cook, stirring once midway, for 20 minutes. Remove from the heat, remove the bay leaf, and season with 1/2 tsp of the remaining salt and the remaining 1/2 tsp black pepper. Cover and set aside.

Position a rack in the upper third of the oven and preheat the oven to 400 F degrees.

Place the potatoes in a saucepan and add enough cold water to cover by at least 1 inch. Bring the water to a gentle boil, season with salt, and cook until the potatoes are fork-tender, 12 to 15 minutes. Immediately drain the potatoes. Pass the potatoes through a ricer into the same pot (or mash until smooth using a potato masher) and return the pot to the stove over low heat. Add the remaining 1/4 teaspoon salt and 3 tablespoons of butter, the half-and-half, white pepper, nutmeg, and 1/2 cup of the cheese. Stir to mix well and cook until heated through.

Transfer the meat mixture to the prepared baking dish. Spoon the mashed potatoes over the meat mixture and, using the back of the spoon, smooth the top of the potatoes. Sprinkle the remaining 1/2 cup cheese over the mashed potatoes. Place the baking dish on a baking sheet and bake until browned and bubbly on top, about 25 minutes. Remove from the oven and serve.

8-10 servings

Emeril Lagasse's Cookbook Sneak Peak: Butternut Squash and Chickpea Tagine

For our second recipe, Shawnie and I chose the Butternut Squash and Chickpea Tagine. (To view the full story, check out this previous post.)

If it weren't for Shawnie, I wouldn't know what a tagine is! Or how to pronounce it, for that matter. I didn't end up shooting any full shots of the tagine, but luckily, Shawnie did in a previous post. It's a ceramic cone on top of a dish (in my words, of course.) I am told it's great for thickening up sauces, as it has a steam hole. Sometimes when making meals like this, everything comes out a little soupy because the steam doesn't dissipate. The tagine takes care of that!


Because it was later in the afternoon on a cloudy, somewhat dreary day, all of the shots have a tinge of blue in them. It makes this dish feel more like fall than summer, but I think it'd still be a nice summer dish. The lemon keeps it nice and light. But it's a great fall dish since most of the ingredients are either grown in the fall or easy to find on the shelf.

I love all thing chick pea, so this was a great recipe for me. I'm not usually a butternut squash fan, but this one was hardly even noticeable. All of the ingredients melded well together. The raisins and onion really helped add a punch of flavor along with the lemon. The couscous made it into a meal instead of a side dish.

One of the things I love about shooting at someone else's house is they have all new stuff! I get to play with new napkins, dishes, glasses, forks, and locations. Shawnie's sunroom was great for shooting in. Simple surfaces and big windows for perfectly even lighting.


We had to laugh when we finished the 2 recipes, because these were the dishes (not including the 2 final pots!) that were used to create them. While it might all end up in one pot, it takes a lot to get it there! At least for the English Cottage Pie. The Tagine was a little less dish-heavy. Oh well, a few dishes never hurt anybody! I'm willing to make the sacrifice in order to have a warm, home cooked meal-by Shawnie. :)

Butternut Squash and Chickpea Tagine

3 tblsp olive oil
1 1/2 c samll diced onion
1 c small diced carrot
1 tsp ground turmeric
1 tsp ground cinnamon
1 tsp ground coriander
1/2 tsp crushed red pepper
3 c peeled and diced butternut squash
1 1/2 c peeled and diced sweet potato
1 tblsp minced garlic
1/2 c golden raisins
1/2 c small diced dried apricots
4 saffron threads, crumbled between your fingers
4 cilantro sprigs, tied together with twine
1 tblsp kosher salt
4 c chicken stock or canned low-sodium chicken broth, plus more if needed
Two 13.5 oz. cans chickpeas, drained and rinsed
1 tblsp chopped Simple Preserved Lemons
1/4 c chopped fresh parsley leaves
1/2 c small diced red bell pepper
1/2 tsp freshly ground black pepper
grated zest of one lemon
2 tblsp freshly squeezed lemon juice
1 tblsp extra virgin olive oil

Heat 2 tblsp of the olive oil in a tagine or Dutch oven over medium-high heat. Add the onion, carrot, turmeric, cinnamon, coriander, and crushed red pepper and cook until the onion is translucent, about 3 minutes. Add the butternut squash and sweet potato and cook for 7 minutes longer, stirring occasionally. Add the garlic, raisins, dried apricots, saffron, cilantro sprigs, 2 tsp of the kosher salt, and 2 cups of the stock and bring the mixture to a boil. Reduce the heat to medium-low and cook, covered for 15 minutes. Add the chickpeas and preserved lemon and cook for 30 minutes longer. Remove from the heat and sprinkle half of the parsley over the top. Set aside while you prepare the couscous.

In a 2-quart or larger saucepan, heat the remaining 1 tblsp olive oil over medium-high heat. Add the bell pepper, black pepper, and remaining 1 tsp kosher salt and cook until soft, about 2 minutes. Stir in the lemon zest and remaining 2 cups stock and bring to a boil. Add the couscous, cover and remove from the heat. Allow the couscous to steam for 5 minutes, then add the lemon juice, extra-virgin olive oil, and remaining half of the parsley and stir to combine. Serve the couscous in shallow bowls, with some of the stew ladled over the top.

Serves 6