Search This Blog

Showing posts with label cookies. Show all posts

Saturday, December 24, 2011

Lemon Ricotta Cookies with Lemon Glaze | Midwest Food Photographer


You could call this a palette-cleansing cookie. That's Top Chef talk, right there. See, reality t.v. is educational. The reason I was drawn to this cookie is because of Northstar Cafe's Cloud 9 Pancakes. Baking with ricotta is not something I would've considered before trying their incredible pancakes. I can't do sweet without savory for breakfast. Adding cheese to pancakes seems to bridge the gap for me, so I thought, why not try it in a cookie? Besides, I love all things citrus. Lemon is so refreshing and light.

Lemon Ricotta Cookies - Buy this image from Photo Kitchen
Love this picture? Buy a copy from Photo Kitchen.


Lemon Ricotta Cookies with Lemon Glaze
www.foodnetwork.com

Ingredients
Cookies:
* 2 1/2 cups all-purpose flour
* 1 teaspoon baking powder
* 1 teaspoon salt
* 1 stick unsalted butter, softened
* 2 cups sugar
* 2 eggs
* 1 (15-ounce) container whole milk ricotta cheese
* 3 tablespoons lemon juice
* 1 lemon, zested

Glaze:
* 1 1/2 cups powdered sugar
* 3 tablespoons lemon juice
* 1 lemon, zested

Directions Cookies:
In a medium bowl combine the flour, baking powder, and salt. Set aside.

In the large bowl combine the butter and the sugar. Using an electric mixer beat the butter and sugar until light and fluffy, about 3 minutes. Add the eggs, 1 at a time, beating until incorporated. Add the ricotta cheese, lemon juice, and lemon zest. Beat to combine. Stir in the dry ingredients.

Line 2 baking sheets with parchment paper. Spoon the dough (about 2 tablespoons for each cookie) onto the baking sheets. Preheat the oven to 375 degrees F.
Bake for 15 minutes, until slightly golden at the edges. Remove from the oven and let the cookies rest on the baking sheet for 20 minutes.

Directions Glaze:
Combine the powdered sugar, lemon juice, and lemon zest in a small bowl and stir until smooth. Spoon about 1/2-teaspoon onto each cookie and use the back of the spoon to gently spread. Let the glaze harden for about 2 hours. Pack the cookies into a decorative container. Yields 2 dozen (or more)

Friday, December 23, 2011

Egg Nog Snickerdoodles | Commercial Food Photographer

Two perfect reasons to make these cookies:
1. You love Egg Nog.
2. You hate Egg Nog but someone left it at your house.

Either way, you'll like these cookies! If you don't, take them to work and make your coworkers eat them. They're really light and the flavors are subtle, a nice contrast to the majority of holiday treats.

Egg Nog Snickerdoodles - Buy from Photo Kitchen


Love this photo? Buy a copy from Photo Kitchen.
 

The paper trees in the background have been my favorite part of this holiday season. I've really enjoyed making them, thanks to fellow photographer and blogger Davina Fear, who happily shared the idea. Those of you who are parents, Davina has some of the cutest crafts and activities I have EVER seen.

Eggnog Snickerdoodle Cookies
www.whatkatiesbaking.com

1 ½ c flour
½ stick butter
½ cup sugar
1 egg
1/2 cup egg nog (I used soy Silk Egg Nog, and it worked perfectly.)
½ tsp baking soda
1 tsp cream of tartar
1/8 tsp salt
1/8 cup sugar + 1 tbsp cinnamon for rolling

Directions:

1. Preheat oven to 350 degrees.
2. Sift together flour, cream of tartar, baking soda, and salt; set aside.
3. In the bowl of an electric mixer fitted with a paddle attachment, combine butter and 1/2 cup sugar. (I used the paddle attachment like it says, but I used a regular beater for my next cookie recipe (also to combine butter and sugar) and it worked just fine.
4. Beat on medium speed until light and fluffy, about 2 minutes. Scrape down sides of bowl.
5. Add egg and eggnog, and beat to combine.
6. Add dry ingredients, and beat to combine. Don't overmix.
7. You can chill the dough for an hour or more to make the dough easier to scoop, or go ahead and scoop them a little messier.
8. In a small bowl, combine 1/8 cup sugar and 1 tbsp ground cinnamon.
9. Use a small ice-cream scoop or a tablespoon to form balls of the dough, and roll in cinnamon sugar.
10. Place about two inches apart on the prepared baking sheets.
11. Bake until the cookies are set in center and begin to crack, about 10 minutes, rotating the baking sheets after five minutes. The cookies will feel a little doughy when you touch them, but trust me, they're finished.
12. Transfer the cookies to a wire rack as soon as they are cool enough to not fall apart. Yields 18-20 cookies.

Thursday, December 22, 2011

Cream Cheese Sugar Cookies | Midwest Food Photographers

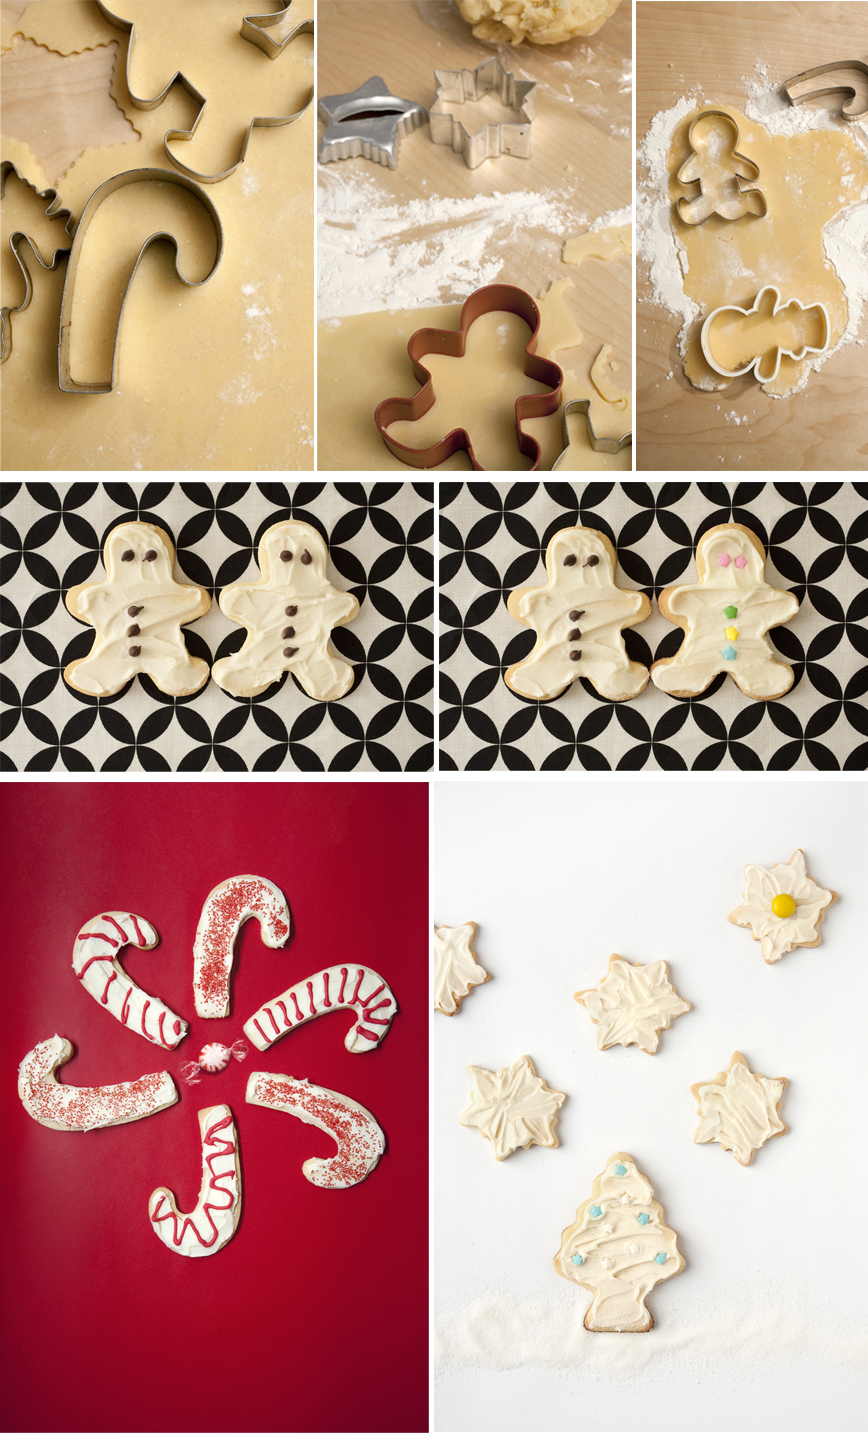
Sugar cookies are the most versatile cookie for decorating. Perfect for any shape, icing, and sprinkle you can imagine. I can't say this is the best sugar cookie recipe in the world, but it might be your favorite. How do you know unless you try it?

Love this photo? Buy it from Photo Kitchen.
For a little while when we were younger, my brother and I spent a LOT of time icing cookies. His was done at Cheryl's Cookies and mine was at a deli that had a large variety of pastries and sweets. We both got really good at it, and I still find it comforting to take out a tray of cookies and smear the icing on. Maybe he and I will do a How-to video someday.

Cream Cheese Sugar Cookies

Ingredients

* 1 cup white sugar
* 1 cup butter, softened
* 1 (3 ounce) package cream cheese, softened
* 1/2 teaspoon salt
* 1/2 teaspoon almond extract
* 1/2 teaspoon vanilla extract
* 1 egg yolk
* 2 1/4 cups all-purpose flour

Directions

1. In a large bowl, combine the sugar, butter, cream cheese, salt, almond and vanilla extracts, and egg yolk. Beat until smooth. Stir in flour until well blended. Chill the dough for 8 hours, or overnight.
2. Preheat oven to 375 degrees F (190 degrees C).
3. On a lightly floured surface, roll out the dough 1/3 at a time to 1/8 inch thickness, refrigerating remaining dough until ready to use. Cut into desired shapes with lightly floured cookie cutters. Place 1 inch apart on ungreased cookie sheets. Leave cookies plain for frosting, or brush with slightly beaten egg white and sprinkle with candy sprinkles or colored sugar.
4. Bake for 7 to 10 minutes in the preheated oven, or until light and golden brown. Cool cookies completely before frosting.


Tuesday, December 20, 2011

Mexican Hot Chocolate Cookie | Professional Food Photographer

My first experience with sweet treats made spicy was actually in Mexico, in 2002. We were at a resort that served Mexican Coffee after dinner, and it had cinnamon and something some type of pepper in it. It was wonderful. It took a few years before I saw anything similar back home, and that was of course Jeni's Queen City Cayenne ice cream. I always try the most unusual flavor on any menu, and when I saw chocolate and cayenne together, I had to have it. Sometimes I love unusual things just because of their uniqueness factor, but later the novelty will wear off. Many years later, Queen City Cayenne is still my favorite of Jeni's signature flavors.


When I saw Martha's take on a spicy sweet treat, I jumped on it. The only downside to these cookies was the need for a warning label, so kids wouldn't assume they were just chocolate cookies. Oh well, it makes for cuter packaging with the little warning label attached.


Mexican Hot Chocolate Cookie
from Martha Stewart

    * 2 1/4 cups all-purpose flour
    * 1/2 cup unsweetened cocoa powder
    * 2 teaspoons cream of tartar
    * 1 teaspoon baking soda
    * 1/2 teaspoon coarse salt
    * 1 cup (2 sticks) unsalted butter, room temperature
    * 1 3/4 cups sugar
    * 2 large eggs
    * 2 teaspoons cinnamon
    * 1/2 teaspoon chile powder (I used ground cayenne)

Directions

   1. Preheat oven to 400 degrees, with racks in upper and lower thirds. In a medium bowl, sift together flour, cocoa powder, cream of tartar, baking soda, and salt. In a large bowl, using an electric mixer, beat butter and 1 1/2 cups sugar on medium speed until light and fluffy, about 2 minutes. Scrape down side of bowl. Add eggs and beat to combine. With mixer on low, gradually add flour mixture and beat until combined.
   2. In a small bowl, combine remaining 1/4 cup sugar, cinnamon, and chile powder (if using). Using heaping tablespoons, form balls of dough and roll in cinnamon-sugar mixture. Place, about 3 inches apart, on two parchment-lined baking sheets. Bake until cookies are set in center and begin to crack, about 10 minutes, rotating sheets halfway through. Let cookies cool on sheets on wire racks 5 minutes, then transfer cookies to racks to cool completely. Makes 32. Store in an airtight container, up to 1 week.

Monday, December 19, 2011

Galaxy Cookies | Food Photography and Styling

These Galaxy Cookies may look humble, but believe me, they're out of this world. (Ha! That was a pun I stole from my sister.) Really, these are one of my all-time favorite cookies. I loved making them as a kid. The best part is you can decorate and fill them with anything you love. Hands down, my favorite is Maraschino Cherry.


It's a simple colored dough wrapped around a candy or nut and topped with sprinkles. You can also cover them in icing. What should you put in them? How about...


Galaxy Cookies
from Betty Crocker

1/2 cup butter or 1/2 cup margarine, softened
3/4 cup confectioners' sugar
1 tablespoon vanilla
food coloring
1 1/2 cups all-purpose flour
1/8 teaspoon salt
anything you want to put in the middle

Icing

1 cup confectioners' sugar
2 1/2 tablespoons light cream or 1 1/2 tablespoons milk
1 teaspoon vanilla

Directions

Mix thoroughly butter, sugar, vanilla, and, if desired, a few drops of food coloring. (Or you can wait to add the food coloring when the dough is finished in order to split it into batches and make multiple colors instead of just one.)
Work in salt and flour until dough holds together. If dough is dry, mix in 1 to 2 Tbsp light cream.
Mold dough by tablespoonfuls around date, nut, candy, cherry, or a few chocolate pieces. Roll into balls. Here, you can choose to decorate with sprinkles, or wait until they're baked and top with icing.
Preheat over to 350°F. Place cookies about 1-inch apart on an ungreased cookie sheet. Bake 12-15 minutes until set but not brown.
Prepare icing by mixing confectioners sugar with light cream or milk and vanilla until smooth. If desired, stir in a few drops of food coloring. For a tasty chocolate icing, increase light cream to 3 tbsp and stir in 1 oz melted unsweetened chocolate.
Let cookies cool, then dip tops of cookies into icing several times to get a good layer. If desired, immediately decorate with coconut, nuts, colored sugar, candies, chocolate pieces or chocolate shot.
Makes 20 to 25 cookies.


Monday, December 27, 2010

A Cookie Kind of Holiday

The best thing about cookies is they come in so many shapes and sizes, colors and designs, flavors and textures. You can dress them up however you like, you can make them in a hurry or take all day. The variety is endless and the eating is divine!